Read The Doc + Sphinx
1.环境搭建
这里以 Ubuntu 为例(其他 Linux 发行版、MacOS 或 Windows 也行),首先安装 Python3、Git、Make 等基础软件。
 sudo apt install git
 sudo apt install make
 sudo apt install python3
 sudo apt install python3-pip
然后安装最新版本的 Sphinx 及依赖。
pip3 install -U Sphinx
为了完成本示例,还需要安装以下软件包。
 pip3 install sphinx-autobuild
 pip3 install sphinx_rtd_theme
 pip3 install recommonmark
 pip3 install sphinx_markdown_tables
安装完成后,系统会增加一些 sphinx- 开头的命令。
sphinx-apidoc sphinx-autobuild sphinx-autogen sphinx-build sphinx-quickstart
2.快速开始
2.1 创建项目
我们以建立 diary 日记文档系统为例,先创建并进入 diary 文件夹(后续所有操作都在该文件夹内)。执行 sphinx-quickstart 构建项目框架,将会出现如下对话窗口。
 欢迎使用 Sphinx 3.2.1 快速配置工具。

 Please enter values for the following settings (just press Enter to
 accept a default value, if one is given in brackets).

 Selected root path: .

 You have two options for placing the build directory for Sphinx output.
 Either, you use a directory "_build" within the root path, or you separate
 "source" and "build" directories within the root path.
 > 独立的源文件和构建目录(y/n) [n]:
首先,询问你是否要创建独立的源文件和构建目录。实际上对应两种目录结构,一种是在根路径下创建“_build”目录,另一种是在根路径下创建“source”和“build”两个独立的目录,前者用于存放文档资源,后者用于保存构建生成的各种文件。根据个人喜好选择即可,比如我更倾向于独立目录,因此输入 y。
接着,需要输入项目名称、作者等信息。
 The project name will occur in several places in the built documentation.
 > 项目名称: diary
 > 作者名称: Rudy
 > 项目发行版本 []: v1
然后,可以设置项目的语言,我们这里选择简体中文。
 If the documents are to be written in a language other than English,
 you can select a language here by its language code. Sphinx will then
 translate text that it generates into that language.

 For a list of supported codes, see
 https://www.sphinx-doc.org/en/master/usage/configuration.html#confval-language.
 > 项目语种 [en]: zh_CN
OK,项目创建完成!(两种目录结构分别如下)
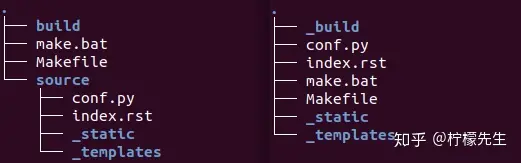
Makefile:可以看作是一个包含指令的文件,在使用 make 命令时,可以使用这些指令来构建文档输出。build:生成的文件的输出目录。make.bat:Windows 用命令行。_static:静态文件目录,比如图片等。_templates:模板目录。conf.py:存放 Sphinx 的配置,包括在sphinx-quickstart时选中的那些值,可以自行定义其他的值。index.rst:文档项目起始文件。
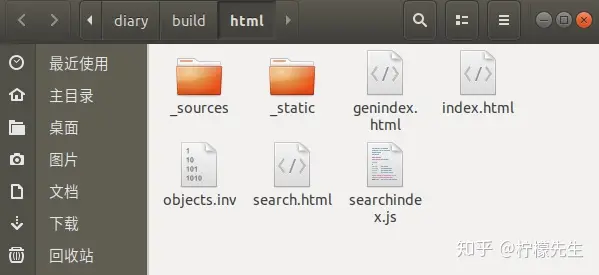
此时我们在 diary 目录中执行 make html,就会在 build/html 目录生成 html 相关文件。
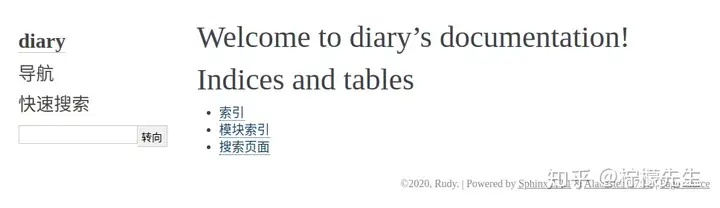
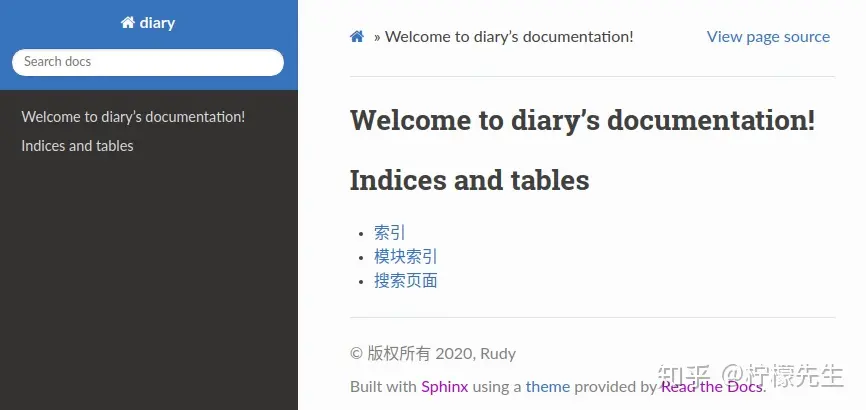
在浏览器中打开 index.html,将会看到如下页面。
当然,直接访问 html 文件不是很方便,所以我们借助 sphinx-autobuild 工具启动 HTTP 服务。
sphinx-autobuild source build/html
默认启动 8000 端口,在浏览器输入 http://127.0.0.1:8000 。但是看到的页面跟上图一样,那换个主题吧!
2.2 修改主题
打开 conf.py 文件,找到 html_theme 字段,修改为“classic”主题。
 #html_theme = 'alabaster'
 html_theme = 'classic'
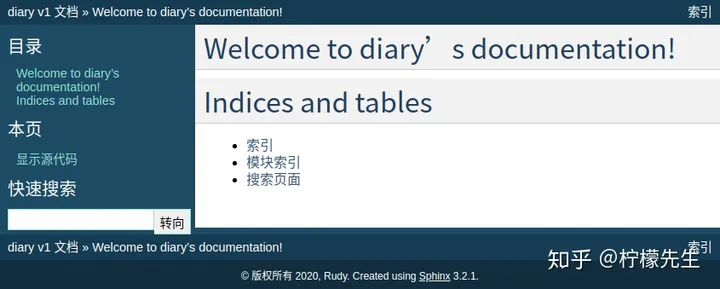
保存!可以看到网页变成这样了
Sphinx 为我们提供了好多可选的主题,在 Sphinx Themes 都可以找到。大家最熟悉的应该是 sphinx_rtd_theme 主题,其实我们前面已经安装好了。
html_theme = 'sphinx_rtd_theme'
那就用这个主题吧!
3.增加宽度样式
3.1 在source/_static/css/extra.css中创建一个仅包含所需样式表的样式表,例如
.wy-nav-content {
    max-width: 85%;
}
3.2 确保在source/conf.py中引用了该目录-我相信默认情况下会有一行执行此操作,即
# Add any paths that contain custom static files (such as style sheets) here,
# relative to this directory. They are copied after the builtin static files,
# so a file named "default.css" will overwrite the builtin "default.css".
html_static_path = ['_static']
3.3 然后在source/_templates/layout.html中创建自定义布局,并执行以下操作以包含样式表
{% extends "!layout.html" %}
{% block extrahead %}
    <link href="{{ pathto("_static/css/extra.css", True) }}" rel="stylesheet" type="text/css">
{% endblock %}
4. ReadTheDoc托管Shpinx
导入项目
注册好后导入自己的代码库,如图


这里要注意的是,如果你更改了requirements.txt文档的路径,此时一定要同时更新位置.否则无法托管
.readthedocs.yaml
# .readthedocs.yaml
# Read the Docs configuration file
# See https://docs.readthedocs.io/en/stable/config-file/v2.html for details

# Required
version: 2

# Set the OS, Python version and other tools you might need
build:
  os: ubuntu-22.04
  tools:
    python: "3.12"
    # You can also specify other tool versions:
    # nodejs: "19"
    # rust: "1.64"
    # golang: "1.19"

# Build documentation in the "docs/" directory with Sphinx
sphinx:
   configuration: source/conf.py

# Optionally build your docs in additional formats such as PDF and ePub
# formats:
#    - pdf
#    - epub

# Optional but recommended, declare the Python requirements required
# to build your documentation
# See https://docs.readthedocs.io/en/stable/guides/reproducible-builds.html
python:
   install:
   - requirements: requirements.txt # 如果移动依赖文件,这里一定要对应到正确的路径中
点击完成后,稍等几分钟即可构建

当然可以点击正在构建您的文件,查看进度

构建完成后,点击阅读文档
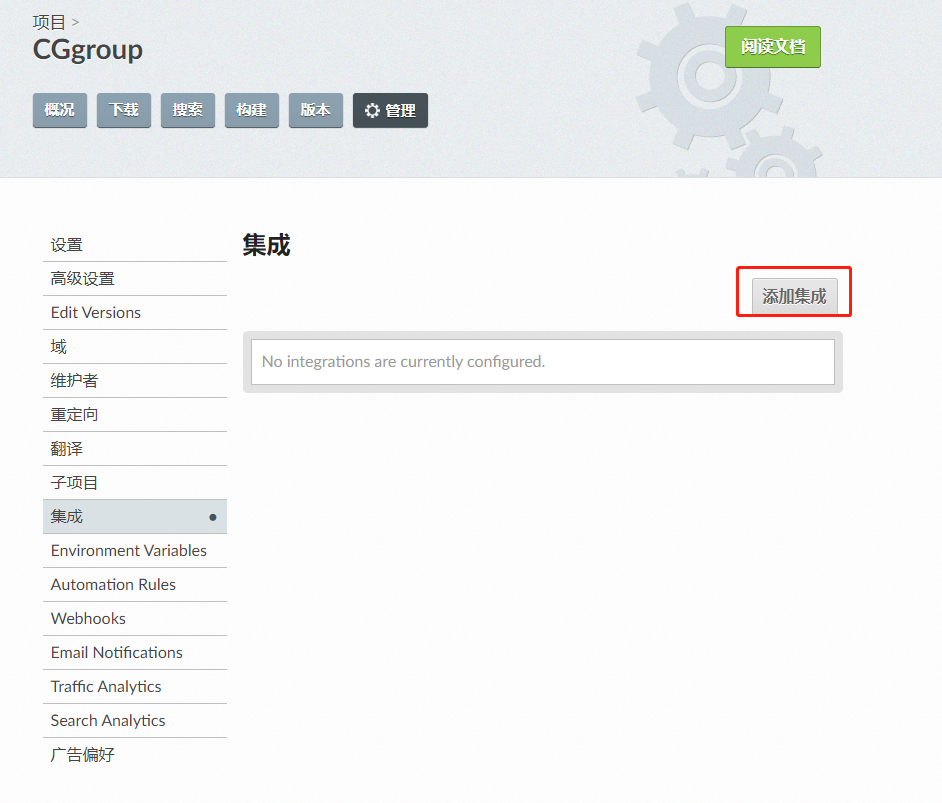
创建钩子
创建项目集成的钩子,目的是在我们更新git仓库的时候,ReadTheDocs自动帮我们重新托管文档,不用自己手动building
操作如图

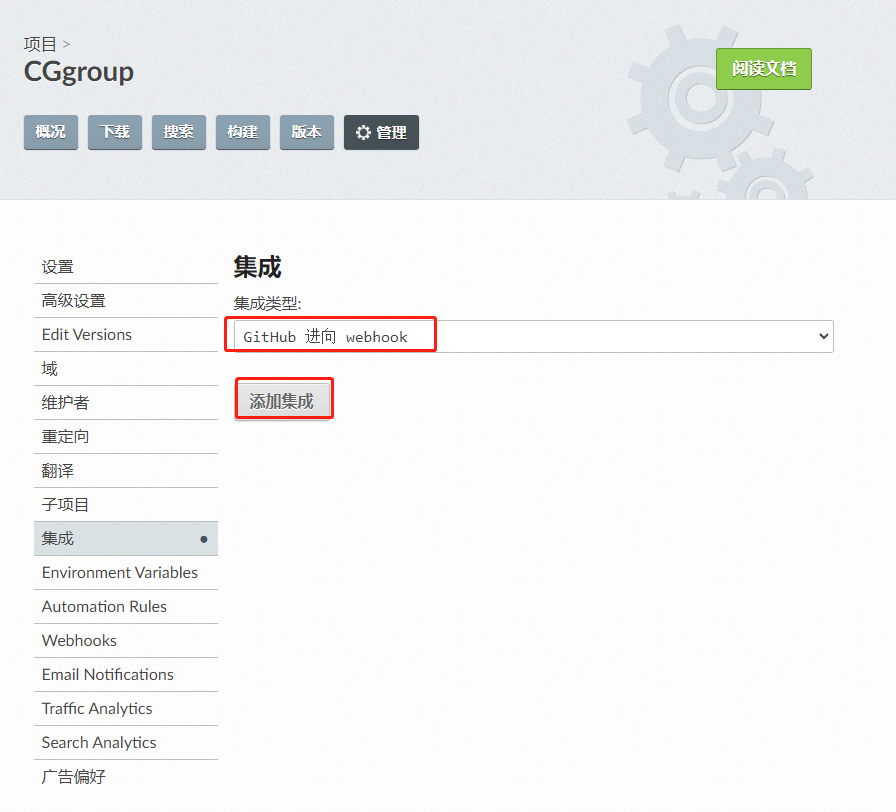

复制上面的路径,粘贴到 仓库webHooks管理中,如图

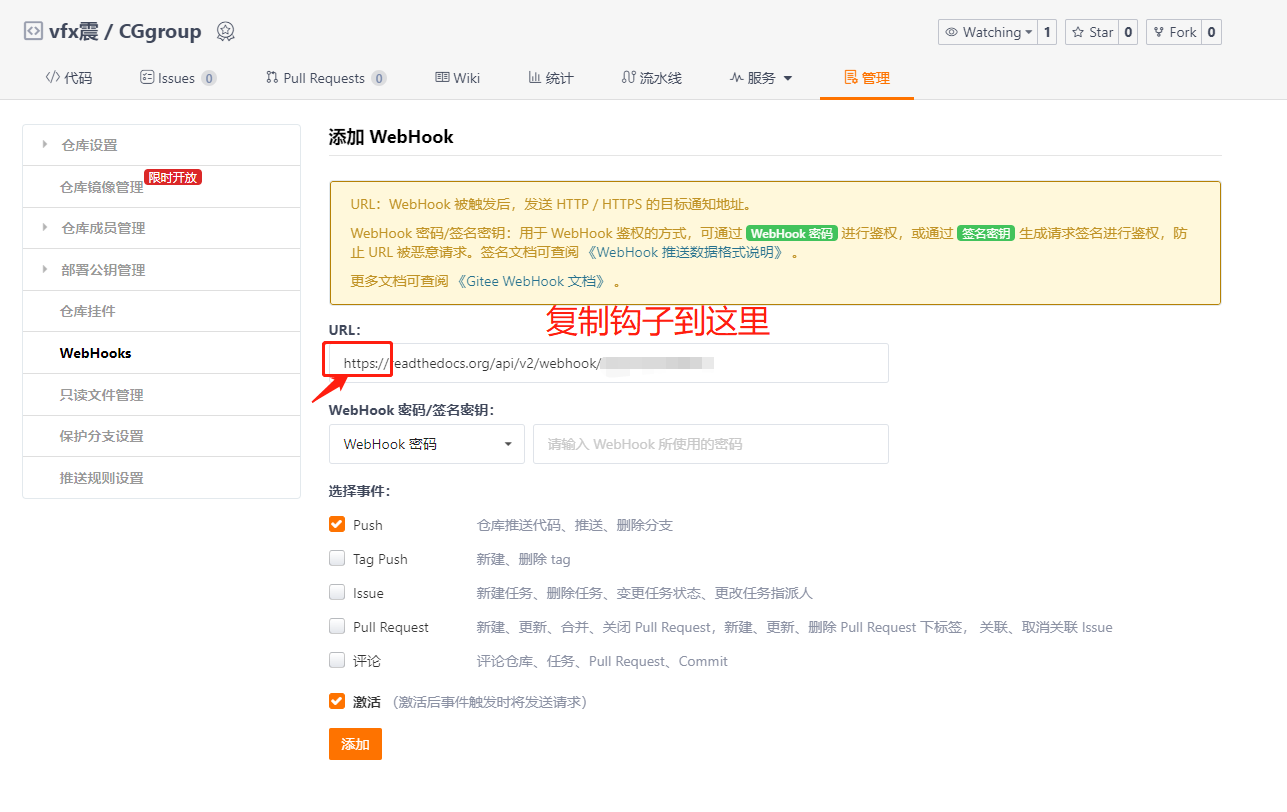
添加后即可,将来更新仓库后,ReadTheDoc会自动创建新的托管文档